Pi My Life Up RasPad Review: The Freedom to Develop

In this Raspad review, we will be delving into a new up, and coming device called the RasPad. The RasPad is a portable Raspberry Pi based tablet developed by SunFounder.
For those who don’t know SunFounder is a company located in the Shenzhen district in China with a focus on creating products for STEM(Science, Technology, engineering, and mathematics) education by making hands-on devices.
The ultimate goal of the RasPad is to lower the barrier for beginners to get started with the Raspberry Pi by creating a convenient and open system.
SunFounder is currently running a Kickstarter campaign for the RasPad, so if you are interested in the device, we highly recommend that you go and check out their campaign. You can also check out SunFounders website for more information on RasPad.
In this review we dive into our thoughts on how the RasPad holds up in reality, how well built the device is and what benefits it brings as a device. While we are using an early production model, this will give you a good idea of what the device brings to the table.
The Case / Build Quality
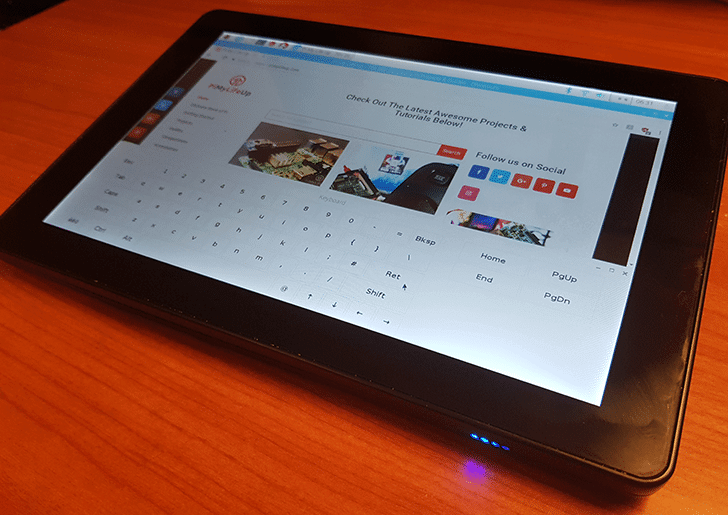
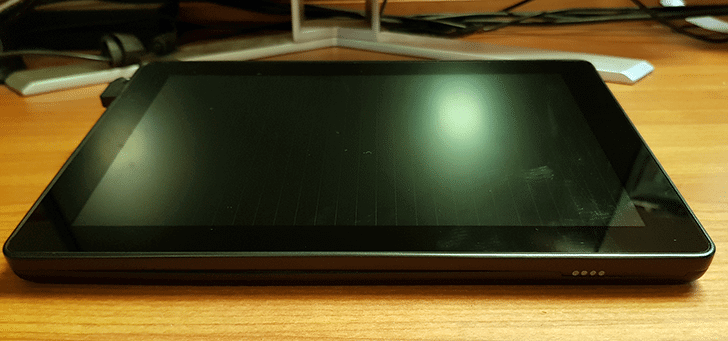
One of the key parts of the RasPad is its case. We found the general shape of the case to be quite well designed, with it giving a good viewing angle when placed on a desk. SunFounder did an excellent job of making use of the thickness that comes from having to fit a Raspberry Pi to create a good wedge shape that angles the screen well while also fitting nicely in our hands.
One thing we liked a lot about the device is that they did not compromise on the access to any of the Raspberry Pi’s ports. With the Raspberry Pi 3, all the USB Ports and the ethernet cable are easily accessed on the side, with no obstructions and no poorly placed plastic blocking access.
The RasPad even offers easy access to the GPIO pins on your Raspberry Pi. To gain access to the GPIO pins you just need to slide off the back plate, and you should immediately have access to the GPIO pins. As a bonus, they have left a significant enough slot in the case so you can easily connect up the wires and seal back up the case. Accessing the GPIO pins is especially easy if you use a GPIO breakout cable. However, we still found it to work just fine with standard breadboard wires as you can see in our photos below.
In addition to the GPIO pins the camera interface (CSI) is also easy to get access to, and they have even thought to add a slot to the back panel so you can thread it out from the case. This is perfect if you like using the Raspberry Pi camera.
The screen has a nice quality feel thanks to the use of scratch resistant glass instead of using plastic as some cheaper screens do. As a bonus, the glass should not scratch as easy meaning your device will look as new for a longer period.
Overall we found the general build quality and the design of the case to be very well thought out. The plastic feels very sturdy, and we believe it will be able to handle a decent amount of use without any issues. The design is well thought out with all the USB Ports of the Raspberry Pi being easily accessible, and even the GPIO ports and the CSI slot can easily be threaded out from the device thanks to well-placed slots.
Battery
The battery is one of the weaker points of the RasPad. From our testing, you will get about 3 hours of solid use before having to recharge the device. This battery lifespan isn’t too bad of a result considering it has to power both the Raspberry Pi 3 and the 10.1-inch touchscreen that is featured on the device.
Since the battery is wired directly into the RasPad’s control board, you will not be able to replace it without some careful desoldering, so we recommend people avoid doing so. A nice feature would have been to allow easier replacement of the battery for when it begins to deteriorate in lifespan.
However other devices don’t offer that ability either, so it is not a huge negative to the RasPad, especially with it being aimed at beginners and its price point is fairly low considering what you get.
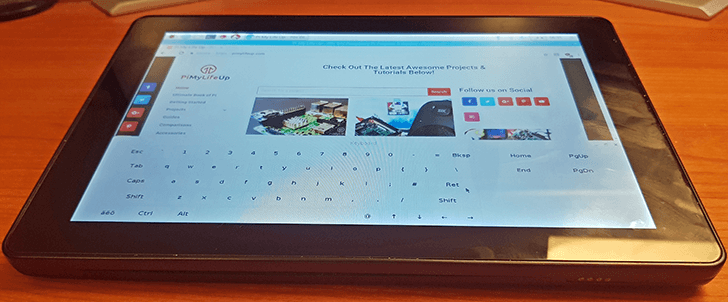
The Touch Screen
The screen is one of the most vital parts of the RasPad and makes up its entire top surface. The RasPad makes use of a 10.1-inch touchscreen with up to 10 points of touch. The touch screen is also an important topic for our RasPad review.
The touchscreen uses an IPS LCD screen meaning it has fairly decent color accuracy and should come across more vibrant than devices that don’t use an IPS screen. Another advantage of using an IPS panel is that you can easily view the screen from different viewing angles, if you have ever looked at a TN Panel screen you will notice that on certain viewing angles you can barely make out the image.
While using the touchscreen, we found the screen to be very responsive. It was easily able to track our touches with no issues at all, and it no times did it feel like it was unresponsive or unable to track our touches accurately. Pressing small elements on the Raspbian GUI like close buttons were a breeze thanks to the accuracy of the touchscreen.
The resolution of the device is 1280×800 pixels, while not the highest resolution it is more than enough for this device. Especially considering the Raspberry Pi itself is not the most powerful devices, using a lower resolution allows better battery life and doesn’t mean the Raspberry Pi has to spend all of its time just trying to render the screen.
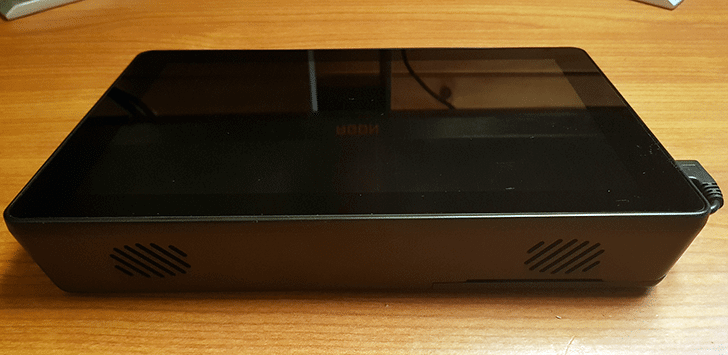
The Speakers
The RasPad comes with two stereo speakers. Straight off the bat, we have to tell you not to expect to hear anything great out of them. We found their quality to be fairly sub-par when compared to the average set of headphones or speakers. The speakers are probably good enough as long as you don’t intend to utilize the device to listen to music or movies and use it for playing sound from a circuit or something similar instead.
It is nice for the RasPad to feature the speakers as it keeps the device fairly portable and doesn’t add the requirement for someone to haul around a set of speakers or headphones to hear audio from the device.
Peripherals
Gaining access to the peripheral slots of the Raspberry Pi is pretty easy on the RasPad. The case has been well designed to give you unrestricted access to all of the Raspberry Pi’s USB Ports and its ethernet port.
Additionally, on the other side of the tablet to your Raspberry Pi, there is a few ports of interest and a couple of buttons. You are given access to a headphone jack that you can use to connect your headphones or speakers, the audio is relayed to it from the Raspberry Pi.
There is also an additional HDMI port, this is another input HDMI device, meaning you can plug another device easily into the RasPad and use it as an additional screen. Alongside this, you can utilize the mini USB port featured on this side also to allow the other device to utilize the touch functionality of the screen.
These two ports allow the RasPad to almost act as a portable touch display that you can quickly connect to other devices, a feature that could be quite useful if you deal with multiple Raspberry Pi’s for instance and don’t want to have to hook them up to a proper monitor.
In addition to these, you will also find the power port on this side. This power port is simply just where you will be plugging in the charger to charge the device.
The last two things to take note is the buttons, these buttons control the brightness of the screen or control the volume of the speakers featured on the RasPad.
Overall the RasPad features a ton of possible inputs and allows easy access to everything you could need. Alongside the extra functionality of also being able to use it as a fairly simple portable display.
Operating System
The RasPad has been specially designed so that it should work with almost any operating system straight off the bat. Of course, you will likely have to install extra software to make the operating system easier to use on a touch device.
For our RasPad review, we mainly tried this out with the Raspbian operating system as it is what we base almost every single one of our tutorials on.
The device worked perfectly without any issues, the screen was instantly picked up, and the touch capabilities worked straight off the bat. There was no need to tinker with anything to get the RasPad working as advertised.
Getting started with the Raspad
To get the RasPad up and running all you need to do is take off the back plate, take our the restraining plate. Place the Raspberry Pi into the slot and plug in both the micro USB cable and the HDMI cable.
Once done, you can put the restraining plate back over the top then slide the back plate back on. These two last bits of plastic will help keep your Raspberry Pi safely in place and will ensure that there is no extra strain put on the main cables.
The last thing you need to do is plug the screens touch USB cable into the Raspberry Pi. This cable will come sitting in the case when you first get it, just pull it out slowly and plug it into the Raspberry Pi. Don’t be to rough with this cable as its just long enough to fit the Raspberry Pi’s USB ports.
Once you have everything up and running and your Raspberry Pi all plugged in simply press the power button to switch everything on. You should see the blue LED’s at the front of the device begin to flash.
One thing we do recommend that you do is to install an on-screen keyboard to the device. To do this, we simply need to run the following couple of commands. Of course, you will need a USB keyboard in the first place to do this.
sudo apt-get update
sudo apt-get upgrade
Sudo apt-get install
sudo apt-get install matchbox-keyboard
That is all the setup we did to do to get the RasPad up and running in a way we worked best. Installing an on-screen keyboard is something you will have to do for any operating system that is not designed for touch interfaces.
Price
The retail price for the RasPad is set to be about $245 USD without a Raspberry Pi and $321 USD for the RasPad with a Raspberry Pi, an SD Card and a Bluetooth keyboard. Currently, these are both on offer for about 40 percent off during SunFounders Kickstarter campaign for the device. This Kickstarter campaign ends on the 04/04/2018.
After using the RasPad for a week, we can genuinely admit that the price is fair for the device that you are receiving. It’s a brilliant device for anyone new to the Raspberry Pi and speeds up the process of getting up and running, something that may be a barrier to keeping some people interested in the Raspberry Pi.
Alongside the benefits to a beginner to the Raspberry Pi the RasPad also offers a fair bit of capability to more intermediate users with its portability, its easy access to the GPIO pins and its ability to be able to be quickly connected up to any device makes it a powerful developing tool.
In addition to all the capabilities of the device, the RasPad is also a very well built device, feeling incredibly sturdy and the plastic doesn’t come off feeling cheap. In addition to this, the screen looks like it is quality and not some cheaply designed piece of equipment, as the touch also works very well on the RasPad.
Overall we believe the capabilities of this device alongside the overall build quality makes the device more than worth the asking price.
The RasPad Review Summary
Overall the RasPad is an incredibly well-built device that comes packed with a ton of features that are incredibly helpful to both beginners and more advanced users. The overall quality of the device is fantastic, during our time with the device we found absolutely nothing that took away from the quality of the device.
There are only three downsides that we found with the RasPad, and that is the audio quality from the speakers, the overall battery life and no ability to replace the battery. Overall these are not huge negatives considering everything else you receive in the device and the price at which it costs.
Below is a summary of our pros and cons of the RasPad from our review.
Pros:
- Great build quality
- Smart and well thought out design
- Great screen with accurate multi-touch support
- Can double up as a portable screen, great for working with multiple Raspberry Pi’s
- A great starting point for beginners and easy to get up and running
- All in one package contains everything you need to get started
- Highly Portable
- Versatile device for the more experienced tinkerer
Cons:
- Battery life is only 3 hours long
- The battery is not removable
- Speaker quality could be improved
If you are interested in buying the device after reading our RasPad review, then we highly recommend you check it out on SunFounders currently running Kickstarter campaign. You can also check out the RasPad on SunFounders website as well.
Source:
By jon
https://pimylifeup.com/raspad-review/